
Projector Headlight Assembly Inspection and Aiming Guide
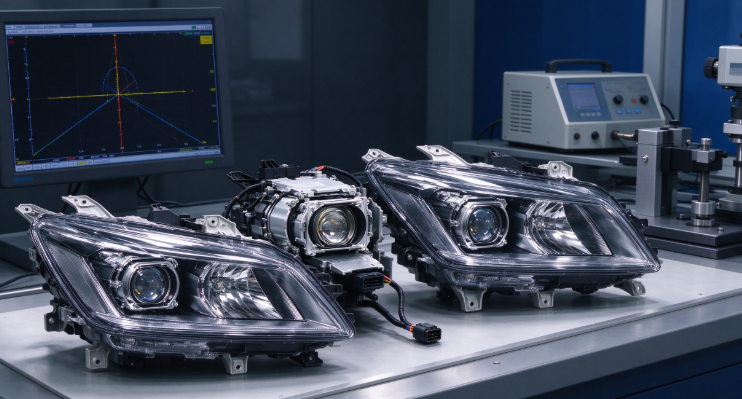
Treat inspection and aiming as part of the assembly
A projector headlight assembly is only dependable when the complete unit is correctly specified, installed, aimed, and checked. A sharp cutoff or a bright spot in a workshop is not enough to prove safe road performance. Buyers and installers should connect the part number to a specific vehicle, use the intended source and wiring, inspect seals and mounts, and verify beam aim after installation. Feng Cheng’s product page describes a precision projector lens, sealed housing, polycarbonate outer lens, factory-style connector layout, and beam alignment and seal-integrity checks before packing. These are useful stated features; purchasers should request the inspection record or sample evidence for the exact order.
In the United States, FMVSS No. 108 governs required lamps and associated equipment. NHTSA’s laboratory test procedure measures headlamp photometry at specified test points and records such items as part number, sample number, light source, test voltage, aim notes, and measured intensity. The procedure is a compliance reference, not a vehicle installation manual. Other markets use different regulations, so check destination rules before ordering.
Inspect the part before installation
Begin before installation with a part and carton audit. Compare the part number, side, vehicle application, source type, connectors, and included hardware against the approved purchase specification. Inspect the polycarbonate lens for scratches, stress marks, or shipping impact. Examine seams, vents, rear covers, adjusters, mounting tabs, and harness grommets for damage or misassembly. Verify that the connector locks fully and that no pin is bent or pushed back. If a separate driver or module is used, confirm transfer, coding, or calibration requirements.
Install and test the electrical system
Install the unit using the vehicle maker’s service procedure. Support the lamp while releasing fasteners so the housing does not twist; route the harness away from heat, sharp edges, and moving parts. Do not force a connector or use unapproved sealant. After fastening, confirm the lamp sits evenly in the body opening, adjacent panels do not press on the lens, and adjusters move through their intended range. A mis-seated lamp can cause both an appearance issue and an aiming error.
Electrical checks should cover each function separately. Test low beam and high beam, turn signal, daytime running lamp, and position lamp if included. Observe for flicker, warning messages, abnormal current draw, or a connector that becomes hot. If one function fails, isolate the circuit before condemning the optic. Follow the service procedure. Do not retrofit a different light source into a headlamp unless the exact combination is designed and permitted for that application.
Aim the beam with the correct procedure
Aiming is a safety and compliance step, not a cosmetic adjustment. Use a level surface and the vehicle manufacturer’s specified distance, load condition, tire pressure, and aim procedure. Check the low-beam cutoff and left-right orientation, then check the high beam. Do not aim by pointing at a wall from an arbitrary distance or by copying another vehicle’s pattern. The NHTSA laboratory procedure includes a 100-foot photometric test distance for specified U.S. compliance test measurements; that laboratory setup should not be confused with a universal field-adjustment distance for every vehicle. Follow the applicable service manual and jurisdictional rules.
Read photometry values in context
The table below illustrates how controlled photometry is reported in the NHTSA laboratory procedure. For an upper-beam UB1 example, the procedure lists a 100-foot photometric test distance and 70,000 candela maximum and 40,000 candela minimum at the H-V test point. These are specific values for that cited test configuration, not universal targets for every projector headlamp. The applicable FMVSS table and system designation determine the correct test points and limits. A buyer should request test evidence for the exact assembly and configuration rather than applying this example to an unrelated product.
Example values from one U.S. compliance-test configuration
Test item | Published procedure value | How to use it |
Standard | FMVSS No. 108 | U.S. lighting requirements; verify current applicability |
Test distance | 100 ft | Laboratory measurement setup in the cited procedure |
Beam example | Upper beam UB1 | A specific system designation, not all projector units |
H-V maximum | 70,000 cd | Limit shown for UB1 at H-V in the cited procedure |
H-V minimum | 40,000 cd | Limit shown for UB1 at H-V in the cited procedure |
Applicable table | Match the system designation | Use the correct table and configuration for formal tests |
The candela figures above apply only to the cited UB1 test point and configuration shown in NHTSA’s laboratory test procedure. They are not a general performance claim about Feng Cheng products or all projector headlamp assemblies.
Investigate moisture with evidence
Moisture diagnosis requires care. A sealed headlamp can still show temporary condensation under some temperature and humidity changes, while persistent water droplets or pooling may indicate a vent, seal, or cover problem. Check the supplier’s written acceptance criteria and the vehicle maker’s guidance before replacing a unit. Feng Cheng states that seal integrity is checked before packing, but the public page does not list an ingress-protection rating or a named environmental test. Ask for the actual method, sample size, and result if water resistance is a contractual requirement.
Keep a traceable final inspection
Record the installation and final inspection. Capture the part number and revision, vehicle details, technician, date, wiring checks, aim method, adjustment results, and any fault codes. For fleets, photos can supplement records but cannot replace photometry. If a mismatch or defect appears, quarantine the lamp and preserve the carton and labels for traceability. This disciplined record helps distinguish supplier defects from vehicle wiring, installation, or aim problems.
NHTSA announced on October 6, 2026 that it plans to review FMVSS No. 108 topics [4] including glare, LED technology, automatic high beams, replaceable light sources, headlamp height and aim, and test procedures for plastic optics. This describes planned modernization, not a final rule already in force. Monitor official rulemaking and use current requirements until any amendment becomes effective.
Frequently Asked Questions
Can a wall check replace photometric testing?
No. A wall check can help identify a gross aiming or cutoff issue, but it does not measure intensity at defined test points. Use the vehicle service procedure for aim and accredited testing when compliance evidence is required.
Does the October 2026 NHTSA announcement mean new headlamp limits already apply?
No. NHTSA described planned review and rulemaking topics. Confirm the effective regulations and official rule text applicable to the destination and order date.
What records should an installer keep?
Record vehicle and lamp part identity, revision, installation date, electrical-function checks, aiming method, adjustment result, and any diagnostic codes.